Aframe Component Registered Again by Aframeextras
Today, I'd like to invite you to build an endless runner VR game with webVR — a framework that gives a dual advantage: It can be played with or without a VR headset. I'll explain the magic behind the gaze-based controls for our VR-headset players by removing the game control's dependence on a keyboard.
In this tutorial, I'll besides show you how you tin synchronize the game land between ii devices which will motility y'all i step closer to building a multiplayer game. I'll specifically introduce more A-Frame VR concepts such as stylized low-poly entities, lights, and animation.
To get started, you will need the following:
- Internet access (specifically to glitch.com);
- A new Glitch project;
- A virtual reality headset (optional, recommended). (I utilize Google Cardboard, which is offered at $fifteen a piece.)
Note: A demo of the final product can be viewed hither.
More than afterwards leap! Go along reading beneath ↓
Step 1: Setting Up A Bones Scene
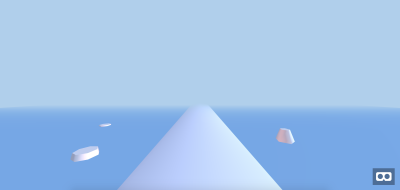
In this stride, we will ready up the following scene for our game. It is equanimous of a few basic geometric shapes and includes custom lighting, which we will describe in more than detail below. As you progress in the tutorial, you will add various animations and furnishings to transform these basic geometric entities into icebergs sitting in an ocean.
You volition get-go by setting up a website with a single static HTML page. This allows you to lawmaking from your desktop and automatically deploy to the spider web. The deployed website tin can then be loaded on your mobile phone and placed inside a VR headset. Alternatively, the deployed website can be loaded past a standalone VR headset.
Get started by navigating to glitch.com. Then, practice the following:
- Click on "New Project" in the meridian correct.
- Click on "hello-webpage" in the driblet downward.
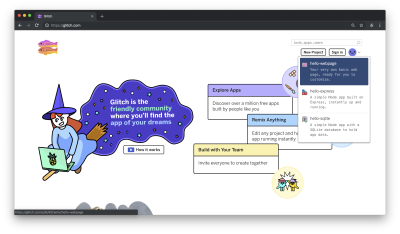
Glitch.com's homepage (Large preview) - Next, click on
index.htmlin the left sidebar. We volition refer to this as your "editor".
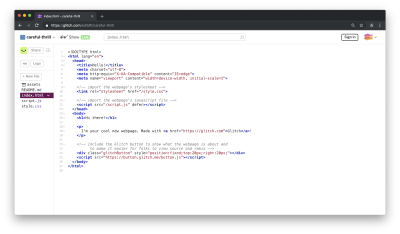
Start by deleting all existing lawmaking in the current alphabetize.html file. Then, type in the post-obit for a basic webVR project, using A-Frame VR. This creates an empty scene by using A-Frame's default lighting and camera.
<!DOCTYPE html> <html> <head> <championship>Ergo | Countless Runner Game in Virtual Reality</title> <script src="https://aframe.io/releases/0.7.0/aframe.min.js"></script> </head> <body> <a-scene> </a-scene> </body> </html> Note: You can learn more about A-Frame VR at aframe.io.
To starting time, add a fog, which will obscure objects far away for u.s.a.. Alter the a-scene tag on line eight.
<a-scene fog="blazon: linear; color: #a3d0ed; near:5; far:twenty"> Moving forrad, all objects in the scene will be added betwixt the <a-scene>...</a-scene> tags. The first item is the sky. Between your a-scene tags, add the a-heaven entity.
<a-scene ...> <a-sky color="#a3d0ed"></a-sky> </a-scene> After your heaven, add together lighting to replace the default A-Frame lighting.
There are three types of lighting:
- Ambient
This is an ever-nowadays light that appears to emanate from all objects in the scene. If you lot wanted a bluish tint on all objects, resulting in blue-ish shadows, you would add a blue ambient light. For example, the objects in this Depression Poly Isle scene are all white. Withal, a blue ambience light results in a blue hue. - Directional
This is analogous to a flashlight which, as the name suggests, points in a certain direction. - Signal
Again, as the name suggests, this emanates calorie-free from a point.
Just beneath your a-sky entity, add the following lights: one directional and one ambience. Both are light blue.
<!-- Lights --> <a-light type="directional" castShadow="truthful" intensity="0.4" color="#D0EAF9;" position="5 3 1"></a-light> <a-light intensity="0.viii" type="ambience" color="#B4C5EC"></a-low-cal> Next, add a camera with a custom position to replace the default A-Frame camera. Just below your a-calorie-free entities, add together the post-obit:
<!-- Camera --> <a-photographic camera position="0 0 2.5"></a-camera> Just below your a-camera entity, add several icebergs using low-poly cones.
<!-- Icebergs --> <a-cone class="iceberg" segments-radial="v" segments-height="three" height="1" radius-tiptop="0.15" radius-bottom="0.5" position="3 -0.1 -one.five"></a-cone> <a-cone form="iceberg" segments-radial="vii" segments-height="three" height="0.v" radius-top="0.25" radius-bottom="0.35" position="-iii -0.i -0.5"></a-cone> <a-cone class="iceberg" segments-radial="6" segments-height="2" height="0.five" radius-pinnacle="0.25" radius-bottom="0.25" position="-5 -0.2 -3.5"></a-cone> Adjacent, add an ocean, which nosotros will temporarily represent with a box, amid your icebergs. In your code, add together the post-obit later the cones from to a higher place.
<!-- Ocean --> <a-box depth="50" width="50" height="1" color="#7AD2F7" position="0 -0.5 0"></a-box> Next, add a platform for our endless runner game to take place on. We will stand for this platform using the side of a big cone. After the box above, add together the following:
<!-- Platform --> <a-cone scale="2 two ii" shadow position="0 -3.5 -1.v" rotation="90 0 0" radius-tiptop="1.9" radius-bottom="1.ix" segments-radial="20" segments-height="20" elevation="xx" emissive="#005DED" emissive-intensity="0.1"> <a-entity id="tree-container" position="0 .5 -1.5" rotation="-90 0 0"> </a-entity> </a-cone> Finally, add the player, which we will stand for using a small glowing sphere, on the platform nosotros just created. Between the <a-entity id="tree-container" ...></a-entity> tags, add the following:
<a-entity id="tree-container"...> <!-- Histrion --> <a-entity id="actor" histrion> <a-sphere radius="0.05"> <a-light type="point" intensity="0.35" color="#FF440C"></a-light> </a-sphere> </a-entity> </a-entity> Check that your lawmaking now matches the following, exactly. You can also view the full source code for pace ane.
<!DOCTYPE html> <html> <head> <title>Ergo | Endless Runner Game in Virtual Reality</title> <script src="https://aframe.io/releases/0.7.0/aframe.min.js"></script> </head> <body> <a-scene fog="type: linear; color: #a3d0ed; near:5; far:20"> <a-sky color="#a3d0ed"></a-sky> <!-- Lights --> <a-lite type="directional" castShadow="true" intensity="0.4" color="#D0EAF9;" position="v three 1"></a-low-cal> <a-light intensity="0.8" type="ambient" color="#B4C5EC"></a-light> <!-- Camera --> <a-camera position="0 0 ii.five"></a-camera> <!-- Icebergs --> <a-cone course="iceberg" segments-radial="5" segments-summit="three" height="1" radius-top="0.xv" radius-bottom="0.5" position="3 -0.1 -i.v"></a-cone> <a-cone class="iceberg" segments-radial="7" segments-height="3" height="0.v" radius-top="0.25" radius-bottom="0.35" position="-three -0.1 -0.five"></a-cone> <a-cone class="iceberg" segments-radial="6" segments-height="two" height="0.five" radius-top="0.25" radius-bottom="0.25" position="-5 -0.2 -3.5"></a-cone> <!-- Ocean --> <a-box depth="l" width="l" height="1" color="#7AD2F7" position="0 -0.5 0"></a-box> <!-- Platform --> <a-cone scale="2 2 2" shadow position="0 -3.five -1.five" rotation="90 0 0" radius-top="1.nine" radius-bottom="ane.9" segments-radial="20" segments-height="xx" height="xx" emissive="#005DED" emissive-intensity="0.ane"> <a-entity id="tree-container" position="0 .v -one.5" rotation="-90 0 0"> <!-- Player --> <a-entity id="actor" player> <a-sphere radius="0.05"> <a-light blazon="point" intensity="0.35" color="#FF440C"></a-light> </a-sphere> </a-entity> </a-entity> </a-cone> </a-scene> </trunk> </html> To preview the webpage, click on "Preview" in the top left. We will refer to this as your preview. Notation that whatever changes in your editor will be automatically reflected in this preview, barring bugs or unsupported browsers.
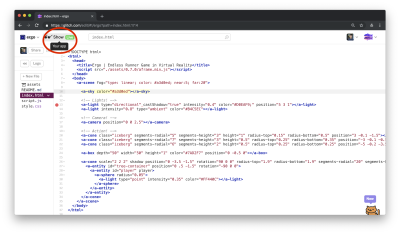
In your preview, yous volition see the following bones virtual reality scene. You can view this scene by using your favorite VR headset.
Ocean and the fixed white cursor (Large preview)This concludes the first step, setting upwardly the game scene's bones geometric objects. In the next step, y'all will add animations and use other A-Frame VR libraries for more than visual effects.
Step two: Improve Aesthetics for Virtual Reality Scene
In this pace, y'all will add a number of aesthetic improvements to the scene:
- Low-poly objects
Y'all will substitute some of the basic geometric objects with their low-poly equivalents for more disarming, irregular geometric shapes. - Animations
You lot volition accept the histrion bob upwards and down, motility the icebergs slightly, and make the ocean a moving body of water.
Your final product for this step will match the following:
To showtime, import A-Frame low-poly components. In <head>...</head>, add the following JavaScript import:
<script src="https://aframe.io...></script> <script src="https://cdn.jsdelivr.net/gh/alvinwan/aframe-low-poly@0.0.two/dist/aframe-depression-poly.min.js"></script> </head> The A-Frame low-poly library implements a number primitives, such as lp-cone and lp-sphere, each of which is a low-poly version of an A-Frame primitive. You can learn more virtually A-Frame primitives over here.
Next, navigate to the <!-- Icebergs --> section of your code. Replace all <a-cone>south with <lp-cone>.
<!-- Icebergs --> <lp-cone class="iceberg" ...></lp-cone> <lp-cone class="iceberg" ...></lp-cone> <lp-cone class="iceberg" ...></lp-cone> We volition at present configure the low-poly primitives. All low-poly primitive supports two attributes, which command how exaggerated the depression-poly stylization is:
-
amplitudeThis is the degree of stylization. The greater this number, the more a low-poly shape can deviate from its original geometry. -
aamplitude-varianceThis is how much stylization can vary, from vertex to vertex. The greater this number, the more than variety in that location is in how much each vertex may deviate from its original geometry.
To go a better intuition for what these 2 variables hateful, you can modify these two attributes in the A-Frame low-poly demo.
For the starting time iceberg, set amplitude-variance to 0.25. For the second iceberg, gear up amplitude to 0.12. For the last iceberg, ready amplitude to 0.one.
<!-- Icebergs --> <lp-cone class="iceberg" amplitude-variance="0.25" ...></lp-cone> <lp-cone class="iceberg" amplitude="0.12" ... ></lp-cone> <lp-cone class="iceberg" amplitude="0.1" ...></lp-cone> To finish the icebergs, animate both position and rotation for all three icebergs. Feel free to configure these positions and rotations as desired.
The below features a sample setting:
<lp-cone grade="iceberg" aamplitude-variance="0.25" ...> <a-blitheness aspect="rotation" from="-5 0 0" to="v 0 0" repeat="indefinite" direction="alternating"></a-blitheness> <a-blitheness aspect="position" from="3 -0.2 -1.5" to="four -0.2 -ii.five" repeat="indefinite" management="alternate" dur="12000" easing="linear"></a-blitheness> </lp-cone> <lp-cone class="iceberg" amplitude="0.12" ...> <a-animation attribute="rotation" from="0 0 -five" to="5 0 0" echo="indefinite" direction="alternate" dur="1500"></a-animation> <a-blitheness attribute="position" from="-4 -0.2 -0.5" to="-2 -0.2 -0.v" repeat="indefinite" direction="alternate" dur="15000" easing="linear"></a-animation> </lp-cone> <lp-cone class="iceberg" amplitude="0.1" ...> <a-animation attribute="rotation" from="5 0 -v" to="five 0 0" repeat="indefinite" direction="alternate" dur="800"></a-animation> <a-animation aspect="position" from="-iii -0.2 -3.5" to="-v -0.2 -five.v" repeat="indefinite" direction="alternate" dur="15000" easing="linear"></a-animation> </lp-cone> Navigate to your preview, and you should see the low-poly icebergs bobbing around.
Side by side, update the platform and associated histrion. Here, upgrade the cone to a depression-poly object, changing a-cone to lp-cone for <!-- Platform -->. Additionally, add configurations for amplitude.
<!-- Platform --> <lp-cone amplitude="0.05" amplitude-variance="0.05" calibration="2 two 2"...> ... </lp-cone> Next, still within the platform department, navigate to the <!-- Player --> subsection of your code. Add the post-obit animations for position, size, and intensity.
<!-- Player --> <a-entity id="actor" ...> <a-sphere ...> <a-animation repeat="indefinite" management="alternating" aspect="position" ease="ease-in-out" from="0 0.5 0.6" to="0 0.525 0.6"></a-animation> <a-blitheness repeat="indefinite" direction="alternating" attribute="radius" from="0.05" to="0.055" dur="1500"></a-animation> <a-light ...> <a-animation repeat="indefinite" management="alternate-contrary" attribute="intensity" ease="ease-in-out" from="0.35" to="0.five"></a-animation> </a-lite> </a-sphere> </a-entity> Navigate to your preview, and you will see your player bobbing up and down, with a fluctuating light on a low-poly platform.
Adjacent, let'southward animate the ocean. Here, you lot can utilise a lightly-modified version of Don McCurdy's ocean. The modifications let us to configure how big and fast the bounding main'southward waves motion.
Create a new file via the Glitch interface, by clicking on "+ New File" on the left. Name this new file avails/bounding main.js. Paste the following into your new ocean.js file:
/** * Apartment-shaded ocean primitive. * https://github.com/donmccurdy/aframe-extras * * Based on a Codrops tutorial: * https://tympanus.net/codrops/2016/04/26/the-aviator-animating-basic-3d-scene-threejs/ */ AFRAME.registerPrimitive('a-ocean', { defaultComponents: { ocean: {}, rotation: {x: -90, y: 0, z: 0} }, mappings: { width: 'ocean.width', depth: 'ocean.depth', density: 'ocean.density', amplitude: 'sea.amplitude', 'aamplitude-variance': 'sea.amplitudeVariance', speed: 'sea.speed', 'speed-variance': 'bounding main.speedVariance', colour: 'ocean.colour', opacity: 'ocean.opacity' } }); AFRAME.registerComponent('ocean', { schema: { // Dimensions of the ocean area. width: {default: 10, min: 0}, depth: {default: 10, min: 0}, // Density of waves. density: {default: 10}, // Wave amplitude and variance. amplitude: {default: 0.1}, amplitudeVariance: {default: 0.3}, // Wave speed and variance. speed: {default: 1}, speedVariance: {default: 2}, // Material. color: {default: '#7AD2F7', type: 'colour'}, opacity: {default: 0.eight} }, /** * Use play() instead of init(), because component mappings – unavailable as dependencies – are * not guaranteed to have parsed when this component is initialized. * / play: function () { const el = this.el, data = this.data; let fabric = el.components.material; const geometry = new 3.PlaneGeometry(data.width, information.depth, data.density, data.density); geometry.mergeVertices(); this.waves = []; for (let v, i = 0, l = geometry.vertices.length; i < l; i++) { five = geometry.vertices[i]; this.waves.push button({ z: five.z, ang: Math.random() * Math.PI * ii, amp: information.amplitude + Math.random() * data.amplitudeVariance, speed: (data.speed + Math.random() * data.speedVariance) / 1000 // radians / frame }); } if (!textile) { textile = {}; material.material = new Three.MeshPhongMaterial({ color: data.color, transparent: data.opacity < 1, opacity: information.opacity, shading: Iii.FlatShading, }); } this.mesh = new Iii.Mesh(geometry, material.material); el.setObject3D('mesh', this.mesh); }, remove: function () { this.el.removeObject3D('mesh'); }, tick: function (t, dt) { if (!dt) return; const verts = this.mesh.geometry.vertices; for (let v, vprops, i = 0; (five = verts[i]); i++){ vprops = this.waves[i]; v.z = vprops.z + Math.sin(vprops.ang) * vprops.amp; vprops.ang += vprops.speed * dt; } this.mesh.geometry.verticesNeedUpdate = true; } }); Navigate back to your alphabetize.html file. In the <head> of your code, import the new JavaScript file:
<script src="https://cdn.jsdelivr.net..."></script> <script src="./assets/ocean.js"></script> </head> Navigate to the <!-- Ocean --> section of your code. Replace the a-box to an a-ocean. Just as before, we prepare amplitude and amplitude-variance of our low-poly object.
<!-- Ocean --> <a-ocean depth="fifty" width="fifty" amplitude="0" aamplitude-variance="0.ane" speed="one.five" speed-variance="1" opacity="1" density="fifty"></a-ocean> <a-ocean depth="50" width="50" opacity="0.5" aamplitude="0" amplitude-variance="0.15" speed="1.5" speed-variance="1" density="fifty"></a-ocean> For your final aesthetic modification, add together a white round cursor to bespeak where the user is pointing. Navigate to the <!-- Camera -->.
<!-- Photographic camera --> <a-camera ...> <a-entity id="cursor-mobile" cursor="fuse: truthful; fuseTimeout: 250" position="0 0 -1" geometry="primitive: ring; radiusInner: 0.02; radiusOuter: 0.03" material="color: white; shader: flat" scale="0.5 0.5 0.v" raycaster="far: 50; interval: g; objects: .clickable"> <a-animation begin="fusing" easing="ease-in" attribute="scale" fill="backwards" from="ane 1 1" to="0.ii 0.two 0.2" dur="250"></a-animation> </a-camera> Ensure that your index.html code matches the Stride ii source code. Navigate to your preview, and you'll detect the updated ocean along with a white circle fixed to the heart of your view.
This concludes your artful improvements to the scene. In this section, you learned how to apply and configure low-poly versions of A-Frame primitives, e.g. lp-cone. In addition, yous added a number of animations for different object attributes, such as position, rotation, and calorie-free intensity. In the next step, you will add the ability for the user to control the role player — but by looking at different lanes.
Stride 3: Add Virtual Reality Gaze Controls
Recall that our audience is a user wearing a virtual reality headset. As a event, your game cannot depend on keyboard input for controls. To make this game accessible, our VR controls will rely but on the user'southward caput rotation. Simply look to the right to move the actor to the right, wait to the center to move to the eye, and await to the left to motion to the left. Our final product will look like the post-obit.
Note: The demo GIF beneath was recorded on a desktop, with user drag as a substitute for caput rotation.
Start from your index.html file. In the <head>...</head> tag, import your new JavaScript file, assets/ergo.js. This new JavaScript file will contain the game's logic.
<script src=...></script> <script src="./assets/ergo.js"></script> </head> Then, add a new lane-controls attribute to your a-camera object:
<!-- Photographic camera --> <a-photographic camera lane-controls position...> </a-camera> Adjacent, create your new JavaScript file using "+ New File" to the left. Use assets/ergo.js for the filename. For the remainder of this step, you lot will be working in this new JavaScript file. In this new file, define a new part to setup controls, and invoke it immediately. Make certain to include the comments below, as nosotros volition refer to sections of lawmaking by those names.
/************ * CONTROLS * ************/ role setupControls() { } /******** * GAME * ********/ setupControls(); Note: The setupControls office is invoked in the global scope, because A-Frame components must be registered before the <a-scene> tag. I will explain what a component is below.
In your setupControls office, register a new A-Frame component. A component modifies an entity in A-Frame, allowing you to add together custom animations, change how an entity initializes, or answer to user input. There are many other apply cases, but you volition focus on the last one: responding to user input. Specifically, you volition read user rotation and motion the player accordingly.
In the setupControls office, register the A-Frame component nosotros added to the camera before, lane-controls. We will add an result listener for the tick event. This event triggers at every animation frame. In this event listener, hlog output at every tick.
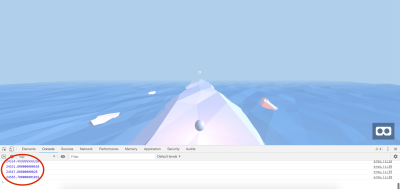
function setupControls() { AFRAME.registerComponent('lane-controls', { tick: function(time, timeDelta) { console.log(time); } }); } Navigate to your preview. Open your browser programmer panel by correct-clicking anywhere and selecting "Inspect". This applies to Firefox, Chrome, and Safari. Then, select "Console" from the peak navigation bar. Ensure that you lot run into timestamps flowing into the console.
Navigate back to your editor. Even so in assets/ergo.js, supercede the body of setupControls with the post-obit. Fetch the camera rotation using this.el.object3D.rotation, and log the lane to motion the player to.
function setupControls() { AFRAME.registerComponent('lane-controls', { tick: function (fourth dimension, timeDelta) { var rotation = this.el.object3D.rotation; if (rotation.y > 0.1) console.log("left"); else if (rotation.y < -0.1) console.log("right"); else console.log("middle"); } }) } Navigate back to your preview. Again, open up your developer console. Attempt rotating the camera slightly, and find console output update accordingly.
Before the controls section, add three constants representing the left, middle, and correct lane ten values.
const POSITION_X_LEFT = -0.5; const POSITION_X_CENTER = 0; const POSITION_X_RIGHT = 0.5; /************ * CONTROLS * ************/ ... At the start of the controls section, define a new global variable representing the player position.
/************ * CONTROLS * ************/ // Position is one of 0 (left), 1 (eye), or two (correct) var player_position_index = one; function setupControls() { ... After the new global variable, ascertain a new part that will move the histrion to each lane.
var player_position_index = 1; /** * Move player to provided index * @param {int} Lane to move role player to */ function movePlayerTo(position_index) { } function setupControls() { ... Within this new function, start by updating the global variable. Then, define a dummy position.
function movePlayerTo(position_index) { player_position_index = position_index; var position = {x: 0, y: 0, z: 0} } After defining the position, update it co-ordinate to the function input.
office movePlayerTo(position_index) { ... if (position_index == 0) position.x = POSITION_X_LEFT; else if (position_index == 1) position.x = POSITION_X_CENTER; else position.x = POSITION_X_RIGHT; } Finally, update the thespian position.
part movePlayerTo(position_index) { ... document.getElementById('player').setAttribute('position', position); } Double-bank check that your part matches the following.
/** * Move player to provided index * @param {int} Lane to motility player to */ office movePlayerTo(position_index) { player_position_index = position_index; var position = {ten: 0, y: 0, z: 0} if (position_index == 0) position.10 = POSITION_X_LEFT; else if (position_index == ane) position.10 = POSITION_X_CENTER; else position.ten = POSITION_X_RIGHT; document.getElementById('histrion').setAttribute('position', position); } Navigate back to your preview. Open up the developer panel. Invoke your new movePlayerTo function from the panel to ensure that it functions.
> movePlayerTo(2) # should movement to right Navigate back to your editor. For the last stride, update your setupControls to move the player depending on camera rotation. Hither, we supercede the console.log with movePlayerTo invocations.
role setupControls() { AFRAME.registerComponent('lane-controls', { tick: function (time, timeDelta) { var rotation = this.el.object3D.rotation; if (rotation.y > 0.ane) movePlayerTo(0); else if (rotation.y < -0.ane) movePlayerTo(2); else movePlayerTo(1); } }) } Ensure that your assets/ergo.js matches the respective file in the Footstep 3 source code. Navigate back to your preview. Rotate the camera from side to side, and your player volition now track the user's rotation.
This concludes gaze controls for your virtual reality endless runner game.
In this department, we learned how to utilize A-Frame components and saw how to modify A-Frame entity properties. This also concludes part 1 of our countless runner game tutorial. Yous now have a virtual reality model equipped with aesthetic improvements similar low-poly stylization and animations, in addition to a virtual-reality-headset-friendly gaze control for players to use.
Conclusion
We created a simple, interactive virtual reality model, every bit a first for our VR endless runner game. We covered a number of A-Frame concepts such as primitives, animations, and components — all of which are necessary for edifice a game on peak of A-Frame VR.
Hither are actress resources and next steps for working more with these technologies:
- A-Frame VR Official documentation for A-Frame VR, roofing the topics used in a higher place in more detail.
- A-Frame Homepage Examples of A-Frame projects, exhibiting dissimilar A-Frame capabilities.
- Depression-Poly Island VR model using the aforementioned lighting, textures, and animations as the ones used for this endless runner game.
In the next part of this article series, I'll show yous how you lot can implement the game's core logic and use more avant-garde A-Frame VR scene manipulations in JavaScript.
![]() (rb, ra, il)
(rb, ra, il)
grasssamissing1973.blogspot.com
Source: https://www.smashingmagazine.com/2019/03/virtual-reality-endless-runner-game-vr-part-1/
0 Response to "Aframe Component Registered Again by Aframeextras"
Post a Comment